

How Can We Help?
Adding Multilingual to Static Pages
Once your portal has the ability to add various language translations, you can get started. We recommend beginning with the Static Pages. This will allow you to get a feel for how the new feature works.
Log into your portal by visiting business.localexploers.com and use your username and password to access your account. On the left hand menu, click “Static Pages”. This will open your static pages dashboard.
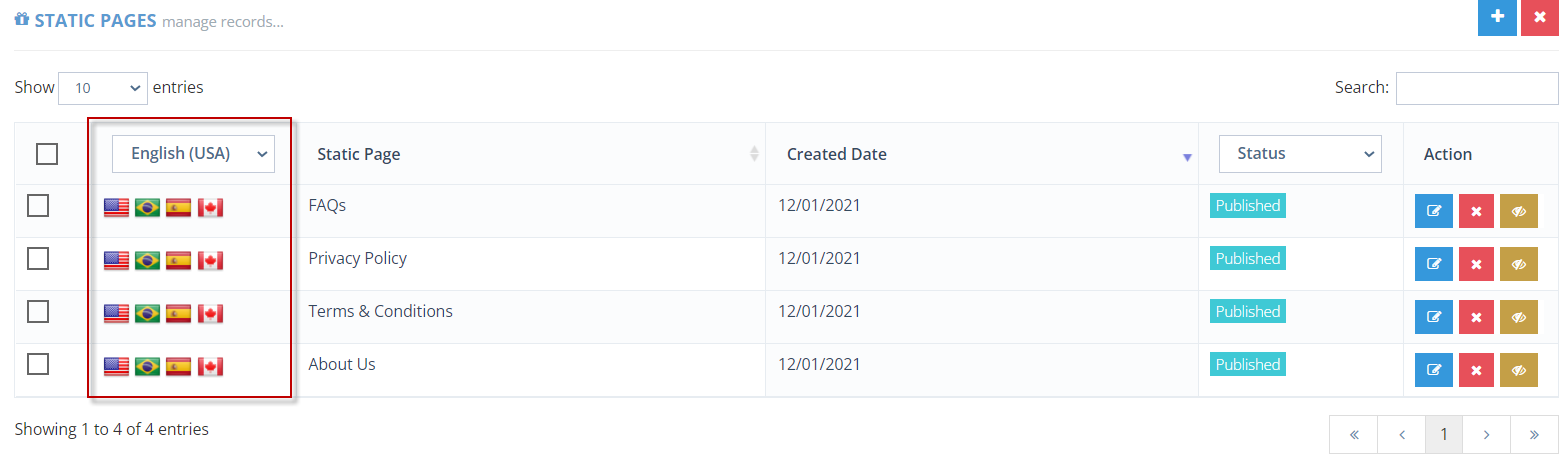
The flags will display on the dashboard for each language that you enabled in your settings > branding tab. If a flag is colored, that means it has been translated. If it’s gray, you can click on it and add the translation.
You can also add a translation (or edit one) by clicking the “edit” icon next to the static page and clicking on the “translation” tab.
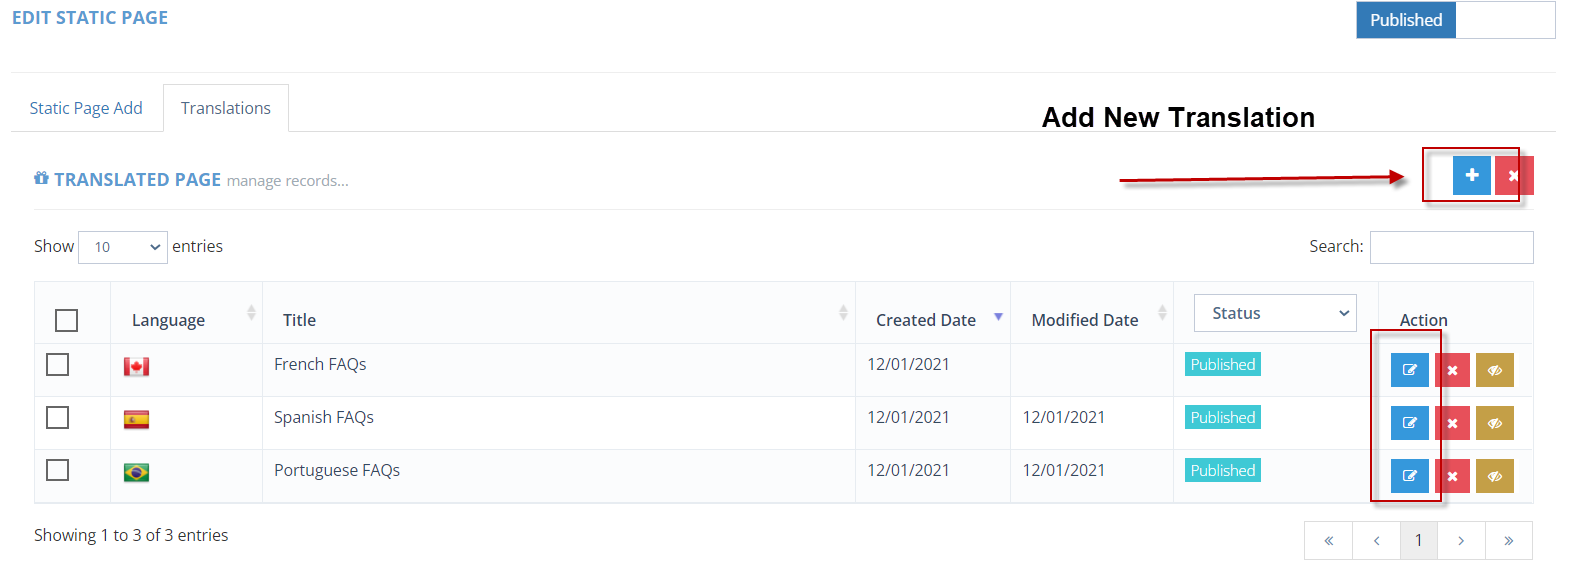
To add a new translation from the translation tab, click on the blue + symbol in the top right corner. You will then be prompted to select which language you’d like to translate.
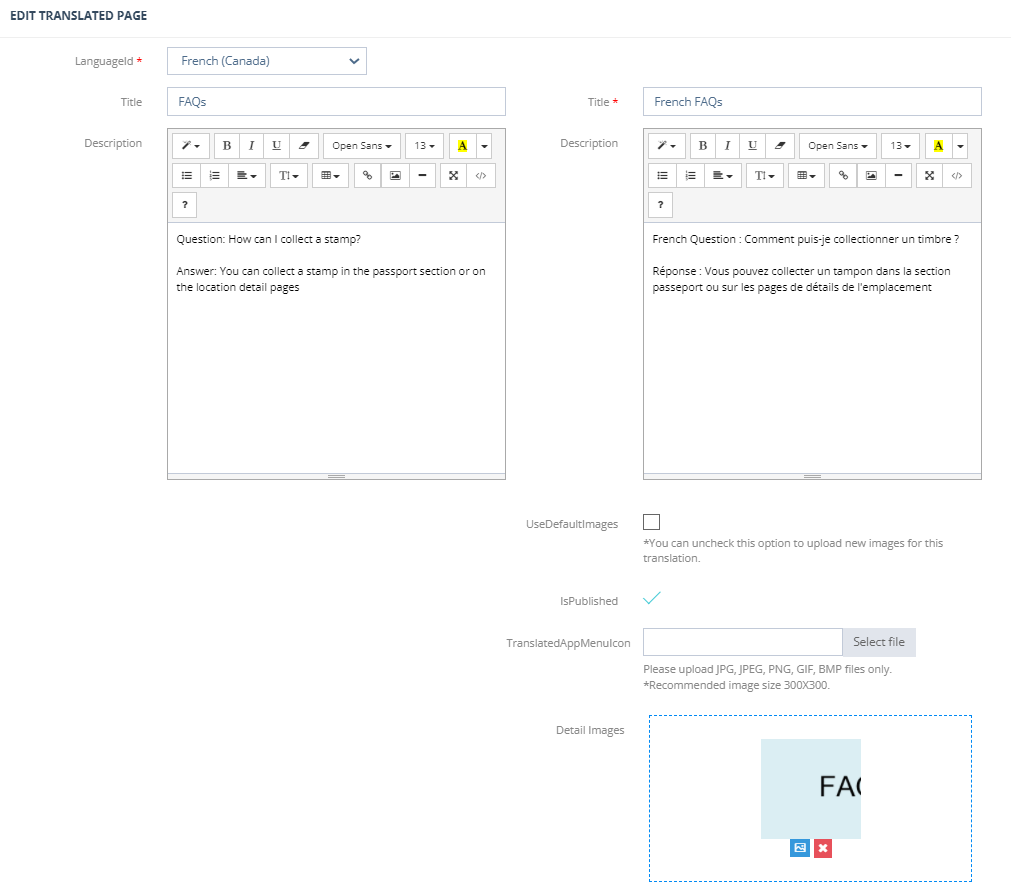
The English data will appear on the left hand side and cannot be edited. On the right hand side you can translate all fields, including images if the translated image is different from the English image. You can translate the title, the description, and detail images.
Note: To change the translated images, please uncheck “UseDefaultImages” under the description field. This box is checked by default and will not allow you to upload new images. Once you uncheck the box, you will be able to add images. Click “Save” when you are finished. The translation will appear in the translation tab and the flag will appear colored in the static pages dashboard.
You can then follow these steps (by clicking on a gray flag to add translation, or editing an existing static page and clicking on the “translation tab”) for all static pages/languages that you desire.