
How Can We Help?
Managing Push Notifications
If you have scheduled a push notification, you have the ability to edit it before it sends, or delete it entirely.
To do so, log into your portal by visiting business.localexplorers.com
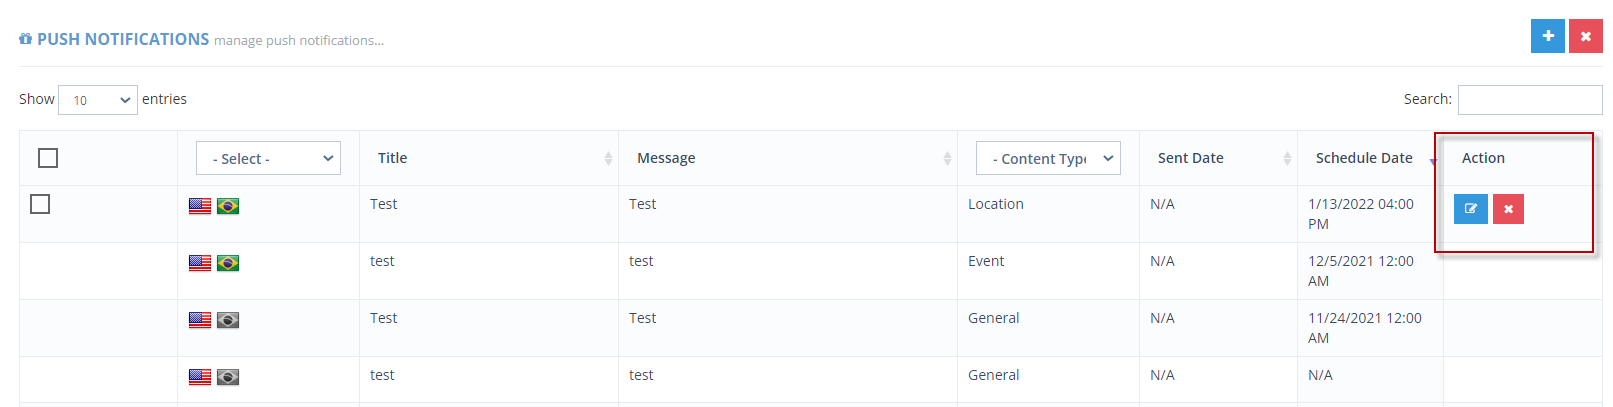
On the left hand menu, click “Push Notifications”. This will open up your push notifications dashboard (aka hub). You can see all push notification that have been successfully sent as well as the schedule ones (for future times/dates).
If a push notification is scheduled, you can click the pencil icon in the action column. This will open up the notification and you can change the type, entity, title, push description as well as the date and time.
To update your changes, click “submit”. You will then be re-routed to the dashboard.
If you’d like to cancel/delete a scheduled push notification, click the red X in the action column for the desired push notification. You will receive a popup to confirm the deletion/cancellation. “Are you sure you want to delete record?” Click OK. The push notification will not be in the dashboard and will not send out to app users.
