

How Can We Help?
Inviting a Business Member
If you’re inviting a new business member to your app, you’ll need to first “create the portal” and send the owner an invitation to register. The process is quite simple!
NOTE: YOU ARE NOT SIMPLY ADDING A LOCATION TO THE LOCATION LIST .
Log into your Association Portal with your username (email address) and password.
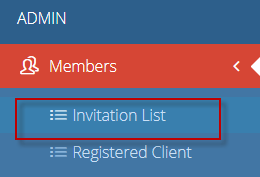
On the left hand menu, under “Members”, select “Invitation List”
This will open the “Clients Dashboard”.
To add a new location, simply click the blue + button in the top right corner

A form will pop up. Fill out all details (Categories, Location Name, Address, Phone Number, Owner Name and Email Address).
Pay special attention to the check boxes at the bottom of the form:
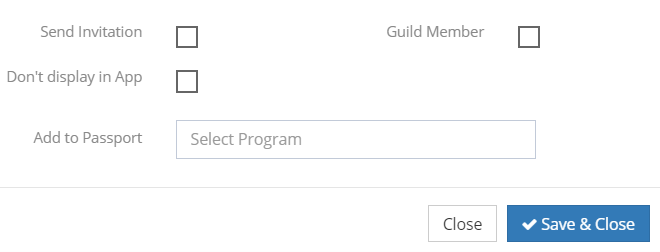
If “Send Invitation” is checked, an email invitation will send immediately to the owner when you click “Save & Close”.
“Don’t Display in App” is for advertisement purposes. Locations that might need a portal, but the location should not display in the app or on the maps.
“Association Member” will assign the location with an association logo, if there is one.
By clicking the “Add to Passport” box, you can select from as many passport programs as you’d like (if your app has more than one).
Click Save and Close to create the portal.